Adding your G-Suite/Gmail address to Mystrika for warmup is a simple process that involves three easy (pre) steps.
Step 1: Enable IMAP Settings
Step 2: Enable Two-Factor Verification (2FA)
Step 3: Create an App Password
Each Email Address added for warmup on Mystrika can be used for sending cold emails, for any cold email campaign on Mystrika.
Follow this guide to get started:
Enable IMAP settings:
-
Go to G-Suite/Gmail.
-
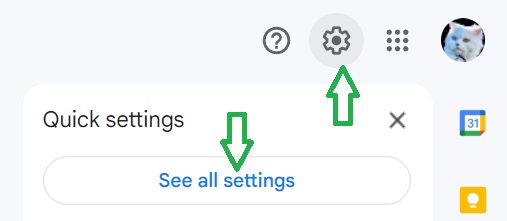
Click on Settings in the top right corner, then select "See all settings."
-
Navigate to the "Forwarding and POP/IMAP" tab.
-
In the "IMAP Access" section, select "Enable IMAP."

-
Save your changes.
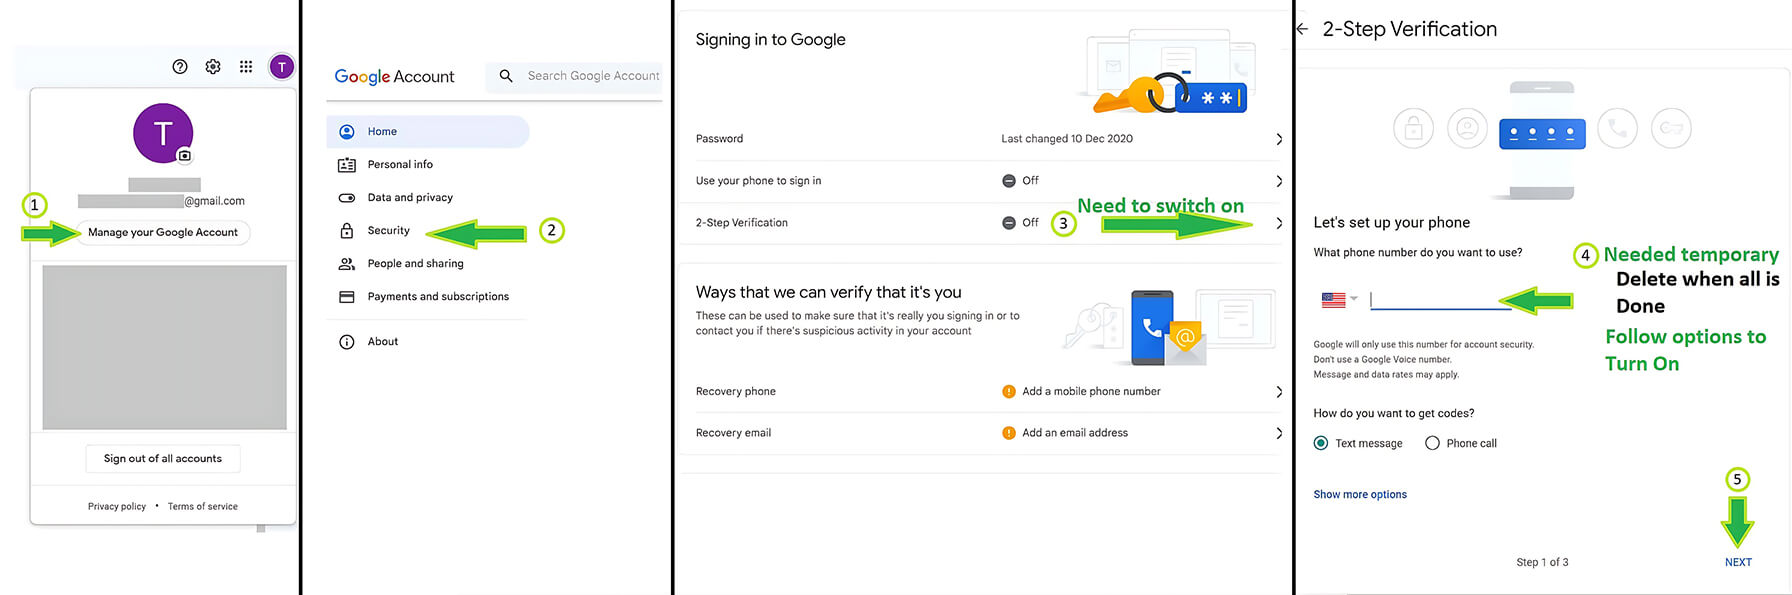
Enable 2 Factor Verification:
-
Go to your Security Settings and locate the "Two-Step Verification" option.
-
Click on "Two-Step Verification" and select "GET STARTED".
-
If prompted, log in to your account again.
-
Set up your phone for Two-Factor Authentication by following the provided instructions.
-
Enter the code you receive on your phone to confirm the setup.
-
Once confirmed, click on "TURN ON" to activate Two-Step Verification.
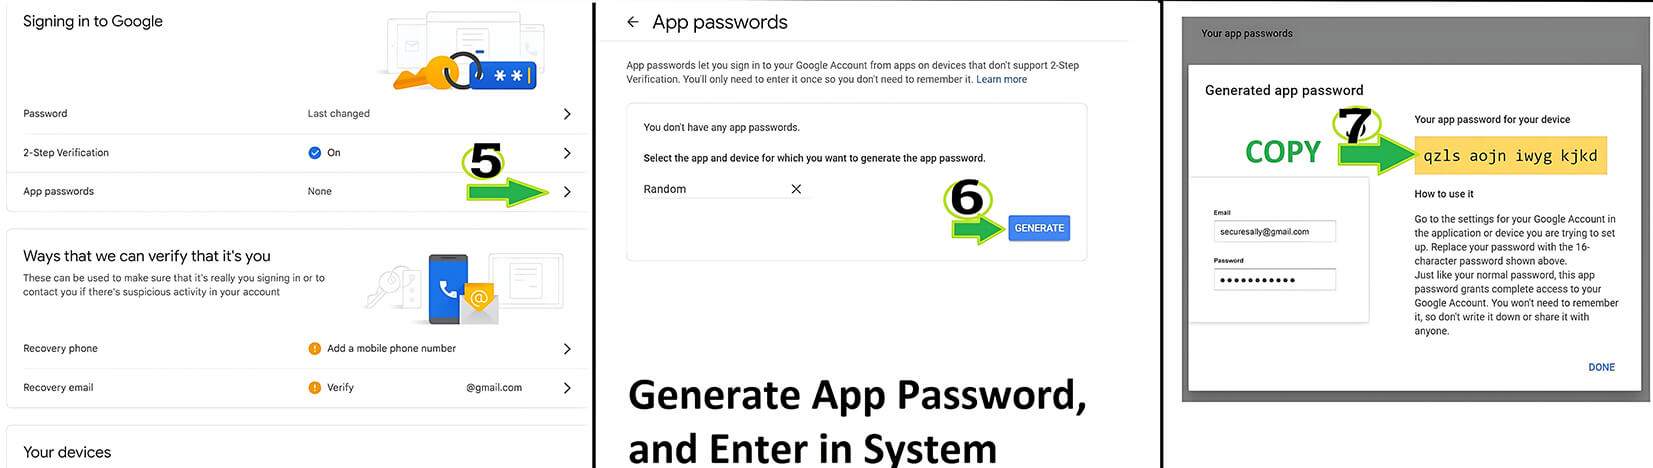
Create App password:
App Password optionhas been moved under2-step verificationnow-
Go to your Security Settings and locate the "App passwords" option or use this Direct link.
-
If prompted, log in to your account again.
-
Select "Mail" as the app and "Other (Custom)" as the device.
-
Enter any name, such as "Mystrika," for tracking purposes.
-
An app password will be automatically generated.
-
Copy and save this app password as we will need it for Mystrika integration.
-
Connecting your account to Mystrika:
-
Go to Mystrika Dashboard
-
Click on "Add Email ID"
-
Enter "Name on the Email Address"
-
Enter "Email Address"
-
Select type as "G-Suite/Gmail"
-
PASTE the App password that you copied earlier from Google accounts.
-
Mystrika will automatically validate the credentials and add account successfully if all goes well.
Just sit and relax, warmup stats will start showing up from next day. Mystrika maintains the Warmup Stats for last 7 days.
Note : Mystrika automatically cleans up the warmup emails (including sent emails), and you can find them in a special folder / label.
The name of the folder / label can be found by going to "Home" > click "four dots" > Warmup Config > Copy "Email Code/Identifier".
(Optional) Tie G-Authenticator to Mystrika for OTP
Mystrika has a unique feature to free up you phone (so that you can re-use them for more email ids, using the OTP system right within Mystrika itself.
-
Go to Mystrika Dashboard
-
Click on four dots for menu next to your G-mail/G-suite email id.
-
Click option "G-Authenticator"
-
Goto Google Security Settings and click on "2-Step Verification".
-
Select Backup Codes and Save them in safe place.
-
Go back and Select Authenticator App "G-Suite/Gmail"
-
Click option "Setup Authenticator" or "Change Authenticator App". Note : If you change app, old one will not work anymore.
-
Right click on QR Code and Save image.
-
Upload the Image on Mystrika, at Step 3 page and click Update Authenticator.
-
COPY the code from Mystrika and PASTE the code on the Google Accounts page at Step 8.
-
If Google verification succeeds for the code, you can generate OTP anytime from Mystrika UI.

If you aren't able to connect your email address
-
Check if you have IMAP enabled, as per process above.
-
Confirm if you are using "App Password", and not your login password.
-
Use an Email Client (like thunderbird) and check if your email settings/credentials are actually working, before reaching to Mystrika Support.
-